You own an AR-15 and you love taking it to the range to fire off a few rounds. If you never want to lose that feeling, you need to learn how to clean an AR-15.
What happens if you don’t clean and maintain your AR-15? Lack of proper maintenance can cause an AR-15 to rust and lose its luster. Just as bad, not cleaning the gun can compromise its safety and performance, making it a less reliable tool for self-defense, combat, or other purposes.
To help you avoid such issues, we’ve put together a comprehensive AR-15 maintenance guide, starting with what you will need to service your rifle.
What You'll Need to Get Started
If you are cleaning an AR-15 for the first time, you'll want to get your hands on these supplies:
- Gun Mat: A gun mat provides a stable and neat surface for disassembling your AR-15 and laying out its components. The surface of the mat will prevent your weapon components from sliding around. Also, laying the mat on your work table or bench will prevent solvent or oil spill damage or stains.
- Cleaning Brush and Cloth: A cleaning patch or rag is an absorbent cloth for applying solvent to your rifle and wiping it clean. You can also use the cloth to apply lubricants to your AR-15. Patches or small pieces of cloth are for cleaning tight spaces, such as inside your barrel. The best cleaning patches and rags have durable cotton, microfiber, or silicone fabric. You will also need a cleaning brush or an old toothbrush to remove stubborn dirt.
- Bore-Guide: Bore-guides are essential for protecting the bore and action of your AR-15 when removing dirt with a cleaning rod. The item will prevent solvent overflow and stop your cleaning rod from rubbing and damaging your rifle’s bore. Since each gun type has a different bore size, you should buy a bore guide made for AR-15s.
- Cleaning Rod: Get a cleaning rod with a nylon brush or jag. The cleaning rod will go inside the barrel of your rifle to dislodge and clean out fouling and foreign matter. Alternatively, you could use a bore snake. Bore snakes are less likely to damage a rifle’s bore, but they are unideal for cleaning stubborn dirt.
- Gun Cleaning Solvent: The solvent will break down accumulated dirt and make cleaning easier. Instead of WD-40 and other common solvents, only use solvents meant for cleaning guns. A quality gun cleaning solvent will soften grime and fouling, enabling you to clean them off with your rod and rag. The solvent will also eliminate the moisture that causes rust and corrosion to develop.
- Gun Lubricant: After cleaning with a solvent, you will need to lubricate the rifle to minimize friction between its components. Do not use regular grease. Instead, use a lubricant recommended for firearms. You can also find all-in-one products that work as a solvent, protective oil, and lubricant for rifles.
- Case: Store your AR-15 cleaning supplies in a convenient storage container after servicing your rifle. You can use a tackle case or a specialized gun cleaning supplies container.
You can buy the above AR-15 cleaning supplies individually or save money by buying a gun cleaning kit that contains everything you need. For example, you could buy Hoppe's 62108 Hunting Gun Cleaning Supplies, which comes fully stocked with everything needed to service an AR-15 and other guns. You will also get a travel storage case for your cleaning supplies.
A Step-by-Step Guide to Cleaning Your AR-15
Once you have your AR-15 maintenance supplies and are ready to take care of your gun, follow these AR-15 cleaning instructions:
1. Prepare Your Cleaning Area and Rifle
Before cleaning your AR-15, you need to prepare a work area and your gun for the task. Start by choosing a workspace, preferably a table or bench large enough to hold your rifle and cleaning supplies. Spread a gun mat over the work surface, then clear your rifle by:
- Pointing the gun barrel away from you
- Ejecting the magazine
- Putting the safety on
- Locking the bolt to the rear
- Checking the chamber for rounds and removing any you find
- Releasing the bolt
Taking these steps will prevent accidentally firing your weapon during the cleaning. Next, remove your ammo from the cleaning table and put on latex gloves to prevent the cleaning chemicals from touching your skin.
2. Separate the Upper Receiver from the Lower Receiver
After unloading your AR-15, release the bolt and hammer. Then, separate the upper and lower receiver by removing the front and rear takedown pins holding the receivers together.
Remove the rear pin by pushing it out of place. Once the rear pin is out, the upper receiver will pivot upwards. You can then push out and remove the front pin to separate the upper and lower receiver. If you can't push out the takedown pins with your finger, use a punch, preferably a nylon or plastic punch that cannot scratch your rifle’s finish.
3. Remove and Disassemble the Charging Handle and Bolt Carrier Group
Be careful when detaching the upper receiver because the bolt carrier group is inside. Pull the charging handle and bolt carrier group out of the breech, but be careful not to drop the bolt carrier group as this might damage it.
Disassemble the bolt carrier group by pushing the bolt to the rear and removing the retaining pin that holds the firing pin. The retaining pin is on the side of the bolt carrier, and you can remove it by hooking and extracting it with a small screwdriver or pin. Push the bolt into the bolt carrier group and pull out the firing pin from the other end.
Next, remove the bolt cam pin at the top of the bolt carrier group. You can accomplish this by rotating the cam pin ninety degrees before lifting it up. Once the cam pin is out, you can pull the bolt from the bolt carrier group. Don't forget to keep track of the separated components because you will need to reassemble the bolt carrier group and put it back in your rifle after cleaning.
Watch this video to see a bolt action group disassembly.
4. Clean the Bolt Carrier
After extracting the bolt carrier from the bolt carrier group, you can clean it as it is or disassemble it for a more thorough cleaning. If you choose to disassemble the bolt carrier, start by removing the extractor. Remove the extractor by pressing your thumb on the extractor and using a small screwdriver or the firing pin to push the extractor pin out of the small hole beside the extractor.
You can then remove the extractor but avoid losing the small spring attached to the extractor. After disassembling the bolt carrier, inspect it for carbon buildup or damage and clean each component with your solvent-soaked rag. Lubricate each component with gun oil, then reassemble. You should also clean and lubricate the charging handle.
5. Clean the Upper Receiver and Barrel
Pick the upper receiver and clean it with a solvent-soaked cloth to remove grease and grime. Be careful when cleaning the gas tube to avoid damaging or plugging it. If you come across any excessive carbon buildup, take your time to eliminate it with your cleaning brush and solvent.
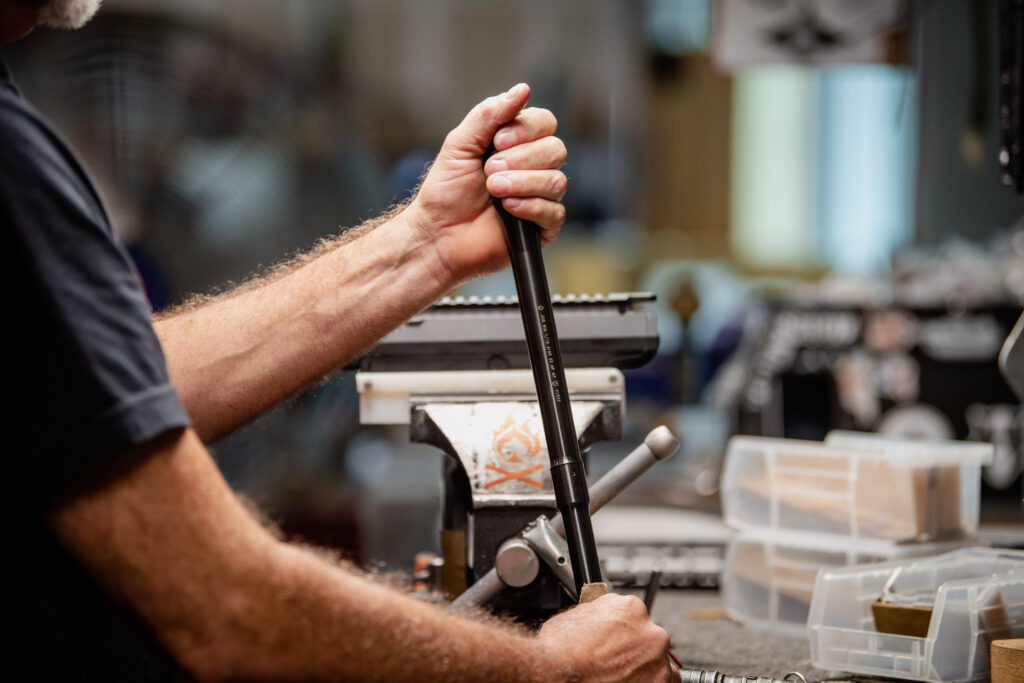
Place the bore guide in the upper receiver and use your cleaning rod to clean inside the bore. Then, attach a solvent-soaked patch or piece of cloth to the cleaning rod and insert it to clean inside the bore. Change the patch to clean the inside of the bore again and keep repeating the process until the cloth comes out dirt-free.
Next, clean the chamber and barrel extension with a solvent-soaked cloth or brush to remove any carbon or debris. After cleaning, soak a fresh patch or cloth with gun oil and use it to lube and protect the inside and outside of the barrel and upper receiver.
6. Clean the Lower Receiver
Get your lower receiver and wipe off excess grime with a solvent-soaked rag. Besides the body of the lower receiver, clean out any dirt and carbon you find in the magazine well. Then, verify that the trigger mechanism’s springs, keeper, and pins are firmly in place. Clean dirt or excess lubricant from the trigger mechanism, paying attention to the trigger well.
Inspect the rifle’s safety to verify that it works properly and remove any debris accumulated in or around it. Check the magazine release and clean and lubricate it to prevent malfunctions.
Lastly, eject the buffer from the buffer tube to inspect and clean it, especially the spring and inside the tube. You can remove the buffer by depressing the detent with a small tool. After cleaning and lubricating the buffer, reattach it to the lower receiver.
7. Lubricate, Wipe Down, and Reassemble
After cleaning and lubricating all the components of your AR-15, it’s time to put your rifle back together. Put the charging handle and bolt carrier group back into the upper receiver. You’ve done the job correctly if the bolt carrier is all the way inside and the bolt action is in battery.
Reattach the upper and lower receiver and hold them in place with the rear and front takedown pins. Give your assembled rifle a final wipe down to remove excess lubricant and make the gun gleam like new.
8. Test the Gun
A how-to clean an AR-15 guide is incomplete if it does not mention testing your freshly cleaned and oiled rifle. You can verify that you’ve assembled your AR-15 correctly by performing a function test that includes:
- Checking if the safety can rotate properly to all positions
- Putting on the safety and pulling the trigger to see if it works
- Pulling the charging handle to verify it can freely slide all the way to the back
- Checking that the bolt carrier slams shut into the battery when you release the charging handle
- Firing the rifle without ammo to test the trigger function and to see if the hammer falls
- Testing if the trigger resets correctly by holding the tripped trigger to the rear and recharging the rifle
If the rifle passes all these tests, it is ready for use or storage.
How to Maintain Your AR-15 After Cleaning
After restoring your gun with our AR-15 cleaning tips, what next? We recommend taking these steps:
Clean Frequently
Clean your AR-15 after each trip to the gun range. Cleaning the gun after firing it at the gun range will prevent rust and the accumulation of debris and fouling that might mess with its performance, longevity, and precision.
However, you don’t have to field strip and clean your gun after each use. Wipe down and lubricate your gun after each use and save field stripping your AR-15 for your thorough monthly cleaning.
Keep Cleaning Tools Clean
Cleaning your AR-15 with a dirty rag or brush can worsen your gun's fouling. Clean your gun maintenance tools before and after each use and store them securely in a case.
Clean Gun Magazines
After servicing your gun, do not neglect to clean your magazines. Dirt in a magazine can move into the gun and cause your AR-15 to malfunction. After cleaning the magazine, lubricate it, but use minimal lubrication because excessive oil can collect dust and dirt, transfer to your ammo, get into your rifle, and cause problems.
Proper Storage
After cleaning your AR-15, store it in a case or bag and place it in a dry and secure place that children or other unwanted persons cannot reach. A rifle stored in a humid environment is more likely to rust.

A Little Care and Maintenance Go a Long Way
Now that you know how to clean an AR-15, you can take care of your beautiful rifle and keep it reliable and functioning perfectly. Frequent maintenance will prolong the life of your AR-15 so that it can serve you for a lifetime and maybe even become a family heirloom.
Are you looking for where to buy the best gun cleaning supplies? Visit Ballistic Advantage today to shop for top-of-the-line rifle cleaning supplies and AR-15 replacement parts.
1 Comment