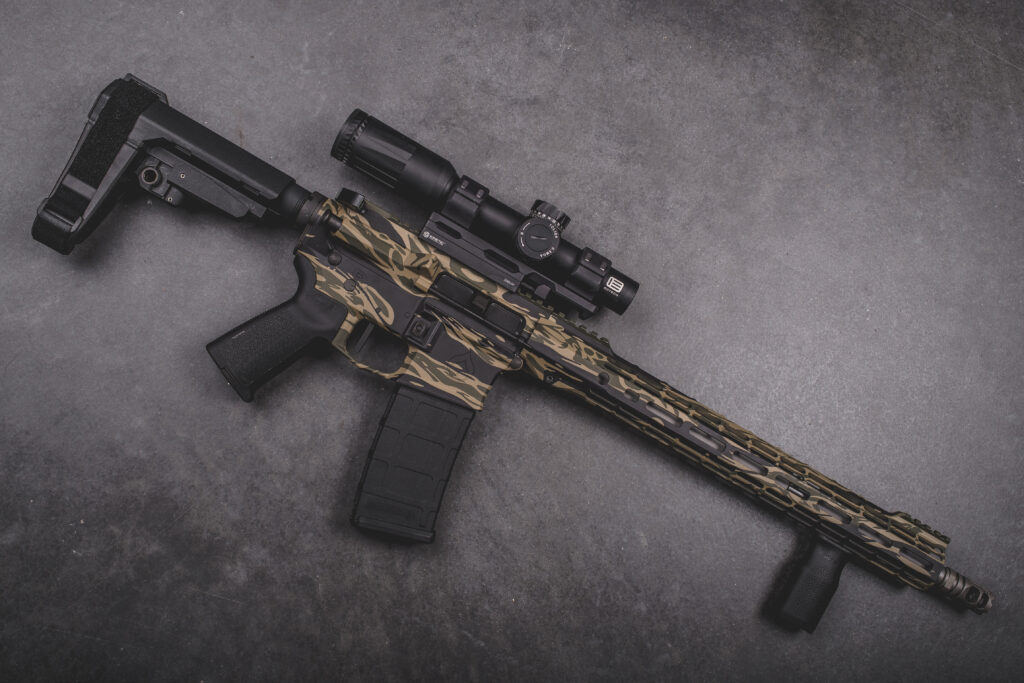
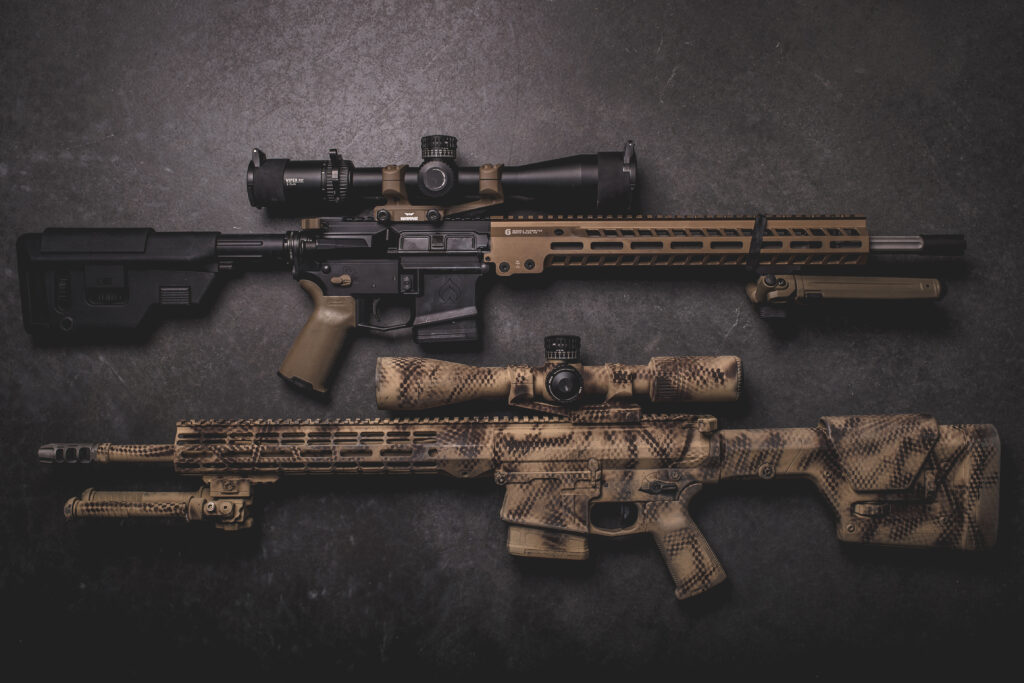
Black AR-15s are a dime a dozen. Why have a gun that looks like everyone else’s when you can have one with a distinctive look that best represents your personality and tastes? Fortunately, customizing an AR-15 doesn't have to be complex or expensive. With spray paint and a few hours, you can personalize your AR-15 to look just the way you want.
If you are new to painting an AR-15, below is everything you need to know about it, including the best paint options for the job and how to paint an AR-15 at home.
Should I Paint My AR-15 Myself or Outsource It?
Outsourcing painting your AR-15 to a professional means less work for you and a lower likelihood of a poorly done paint job. However, painting your AR-15 yourself will cost less. Also, if you outsource painting your AR and later replace a gun component, you'll have to take your gun back for another paint job. Otherwise, your AR-15 will look like a Frankenstein gun with mismatched pieces.
If you paint your AR-15 yourself, you won’t have trouble painting newly added components or accessories to match the rest of your gun. You'll also gain the skills to retouch the paint job if the gun develops scratches or other damages.
How Difficult Is It to Paint an AR-15?
Painting an AR-15 is simple if you have the necessary supplies and know what to do. The job will require cleaning your gun, and depending on the paint job, disassembling the firearm and reassembling it after the paint dries may be necessary. The entire process may take two to three hours because the paint must completely dry before using the gun.
Is It Legal to Paint an AR-15?
Painting an AR-15 is legal as long as the paint won’t hide that the gun is a real firearm. For example, painting just the muzzle orange or red can make an AR-15 look like a toy or Air-Soft gun. Also, your paint job must not obscure or damage the serial number.
What Kind of Paint Can I Use on My AR-15?
Several options are available for painting an AR-15. Some of the most affordable and accessible options for painting your gun at home include:
Spray Paint
Spray paint provides a convenient and low-cost way to customize your firearms. However, not all spray paint is suitable for guns. If you want the best spray paints for AR-15s, your options include:
- Krylon: Krylon spray paint is available in various colors, and the best thing about the paint is it dries in less than 30 minutes. You can use it to paint all parts of your firearm or touch up scratched areas.
- Rust-Oleum: Rust-Oleum is a popular and affordable spray paint perfect for painting metal that gets hot quickly. If you intend on spray painting the barrel of your gun, go for a Rust-Oleum product with high-temperature resistance.
- Dupli-Color Enamel: Dupli-Color Engine Enamel is one of the pricier spray paints. It contains ceramic particles that give the paint a high heat tolerance and resilience. After applying the paint, you can oven-bake your sprayed gun to cure the paint and make it last longer.
Cerakote
The Cerakote H Series does not come in a spray can, but you can apply it with a spray gun. The paint features an advanced ceramic resin technology that offers increased durability and heat resistance up to 1800 degrees Fahrenheit. Several color options are available, but the paint can take up to five days to air dry and fully cure.
Another option is the Cerakote Elite Series, which requires oven curing and contains an advanced ceramic resin that can withstand temperatures up to 500 degrees Fahrenheit. If you use this paint, your gun will be ready to use within 24 hours. Other benefits of the Cerakote Elite Series paint are its high scratch and corrosion resistance and the added lubricity it gives guns to reduce friction between moving parts.
DuraCoat
DuraCoat contains resins and acrylic polymers that deliver a resilient paint coat. It comes in bottles that you can attach to spray guns and convenient spray cans. Several variations are available, such as DuraCoat tactical colors, special effect coatings, and camo paints.
Non-Paint Coating Options
While spray painting an AR-15 is convenient and capable of delivering lasting results, other options are available for even longer-lasting results. These options cost more, and some of the best ones include:
Hydrofilm
If you want to cover your AR-15 with patterns and colorful designs, you can try hydrofilm. The process involves dipping the components you want to paint into a water solution with a film on the surface. The film will transfer the patterns to the gun, and after air drying, you can apply a clear coat to protect the water transferred print.
It takes an hour to complete the process, and thousands of design options are available. However, since hydrofilm can only withstand up to 325 degrees Fahrenheit, we recommend using it only on gun parts that do not heat up, such as the lower receiver.
Parkerizing (Phosphating)
Parkerizing is a non-paint coating option that can give your AR-15 a lasting medium gray or black finish. Besides painting your gun, Parkerizing will protect the components from corrosion and scratches. The process involves submerging the gun parts you want to paint in a phosphoric acid solution heated to 190 to 210 degrees Fahrenheit.
After the gun dries, you can coat it with gun oil or an epoxy or molybdenum finish. Since Parkerized gun parts are self-lubricating, moving firearm components will experience less friction and require less maintenance.
Gun Bluing
Gun bluing can give your AR-15 a gray-blue to dark gray color. Besides changing your gun’s color, bluing will give your firearm a rust-resistant finish and minimize light reflection. It’s one of the more affordable non-paint gun coating options, but a blued gun will require frequent light oiling to ensure maximum corrosion protection.
Can I Paint My AR-15 Barrel?
You can paint your AR-15 barrel, but you have to use paint that can withstand high heat, such as the Cerakote H Series. If you decide to paint your AR-15 barrel or other components yourself, the easiest and least expensive option is painting with a spray can or gun. Follow these steps to spray your AR-15 barrel or the whole gun:
- Remove every accessory attached to the gun, such as the silencer, scope, forward grip, or flashlight.
- Disassemble the gun to paint only specific parts. You can skip the disassembly process if you are painting the whole gun.
- Wear protective gear (gloves, eye protection, and face mask).
- Remove the existing coating or paint from the gun with sandpaper or sandblaster. If you skip this step, your new coat of paint may not adhere.
- Clean the gun with a degreaser that does not leave residue, then wipe the gun dry with a clean, lint-free cloth.
- Use masking tape to cover moving parts and areas you don’t want to paint. Also, plug holes, such as the barrel, ejection port, and magazine well with modeling clay or foam earplugs.
- Use a wire or coat hanger to suspend your gun or the components you want to spray in the air. Hanging your gun will allow you to spray it all around without the gun touching any surfaces.
- Select your spray paint and hold the sprayer six to eight inches from your target. Evenly apply the paint to the gun or component in a sweeping motion.
- Let your first application dry before applying a second coat. If you want a patterned paint job, use a stencil to apply your second coat.
- After the paint air dries (some paints require 30 minutes while others require a day), remove the masking tape and plugs, and reassemble your gun if needed.
Check out this video to see an AR-15 receive a camo paint coat.
Helpful Tips if You Go the DIY Paint Route
Our how-to paint an AR-15 guide won’t be complete without providing tips for achieving the best results if you choose to DIY. Here are our best tips:
Unload the Gun
Before painting any part of your gun, eject the magazine and any chambered round. The precaution will eliminate the risk of accidentally discharging the weapon during painting.
Work in a Well-Ventilated Room
Spray paints contain chemicals that you should not inhale. Since the paint will come out in aerosol form, prevent or minimize inhalation by wearing a mask over your nose and mouth. Also, paint your gun outside or in a well-ventilated room that will provide enough fresh air to defuse the airborne spray paint.
Remove the Old Paint First
Remove the old paint before repainting a gun, accessory, or component. Paint applied on old paint won’t look good or last long. Also, it may increase the size of moving components and affect your gun’s performance.
Clean Off Rust
Paint will not stick well to a rusted gun. Sandpaper, clean, and degrease the gun to prevent such issues. Sandpapering will also help remove pits or scratches that may show under the fresh coat of paint.
Do Not Soak Metal Parts
Brakleen and acetone are both effective degreasers that do not leave a residue. However, avoid soaking non-metal parts of your gun in these chemicals. Instead, clean such parts with a clean cloth dampened with a degreaser.
Practice First
If it’s your first time painting an AR-15, play it safe by practicing with a junker gun. You can also test different paint products and techniques with the junker to find the one that can best satisfy your needs. Lastly, remember to spray paint in a swiping motion and avoid lingering over any spots. Otherwise, some areas will have unsightly paint buildup.
Test the Gun
After painting, drying, and reassembling your freshly painted AR-15, test and dry fire it to verify that everything is working correctly. If you skip this step, you may have to deal with the embarrassment of showing up to a shooting range or hunting outing with a gun that’s all looks and no bang.
Ready to Customize Your AR-15?
Painting an AR-15 does not have to be a frustrating task. If you have the right supplies and follow our how-to paint an AR-15 guide, the process can be fun, allowing you to flex your creativity and own a gun that is unique to you.
Want to learn more about customizing AR-15s to improve performance and aesthetics? Check out our Ballistic Advantage education page or contact us today.
2 Comments